
1 How to Branch
When you create a branch in the repository you enable two different development directions. Later on you might want to merge the branches again, or you might want to discard one.
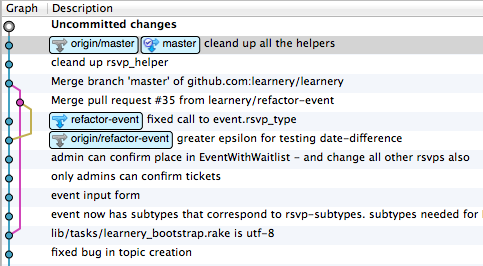
Some tools offer visual displays of these branches. Here is a screenshot from SourceTree:
2 Behind the scenes
Git keeps track of all the commits. A branch is a pointer to a certain commit. To begin with you only have a master branch, and it points to the most recent commit, in this figure that is c2:

2.1 create a new branch
A new branch just points to the same commit as the current branch. In this figure the new branch iss53 (probably created to fix issue 53) also points to commit c2:
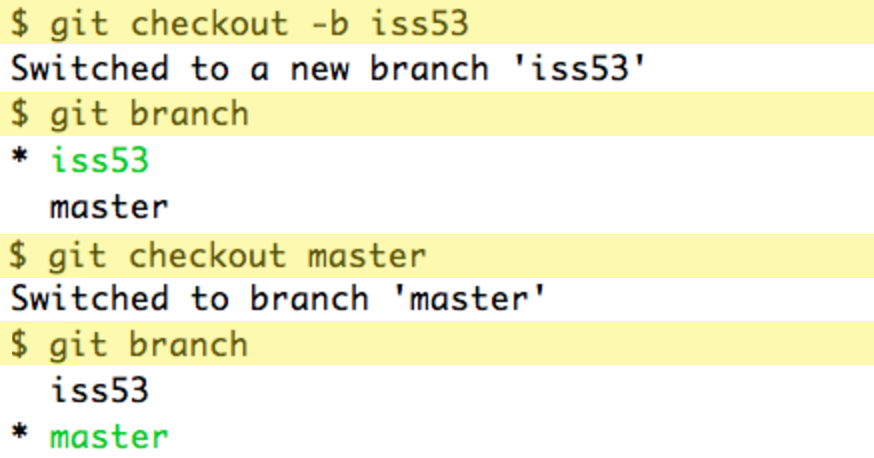
$git checkout -b iss53

With git checkout you can switch to a different branch -
this will not change the branches in any way:
2.2 work on two different branches
When you continue to work in your project, and you make new commits to the master branch and the iss53 branch you may end up in a situation like in this figure:

Now the content of the two branches is different,
when switching to another branch with git checkout you will
see the files in your working copy change.
3 Merging
The process of combining branches again is called merging. Git will try to do this automatically, and in many cases this is not a problem. For example if the two branches changed different files.
This is the process: you should be on the branch that you
want to continue using, in the example below this is master.
Then you issue the command to merge in the other branch.
If all goes well the output will look like this:
$ git checkout master
$ git merge iss53
Merge made by recursive.
 README |    1 +
 1 files changed, 1 insertions(+), 0 deletions(-)
After the successfull merge the current branch (master)
contains all the changes from both branches. The other branch
is still unchanged:

You probably do not need the other branch any more and can delete it:
git branch -d iss53
3.1 Conflicts
Merging is not always so easy. When both branches contain changes for the same file git might not be able to merge them automatically. Then the repository will be left in an "unmerged" state:
$ git status
index.html: needs merge
# On branch master
# Changed but not updated:
#
#   unmerged:   index.html
#
The "unmerged" files will contain "conflict markers" to indicate where git tried to merge but failed. Here a developer is needed to look at the code and decide which version to keep, or how to combine the two versions.
Here an example of an "unmerged" html file:
</div>
<<<<<<< HEAD:index.html
<footer>contact: support@github.com</footer>
=======
<div id="footer">
  please contact us at support@github.com
</div>
>>>>>>> iss53:index.html
</body>
</html>
If you use an editor with appropriate syntax highlighting this might be easier to read:
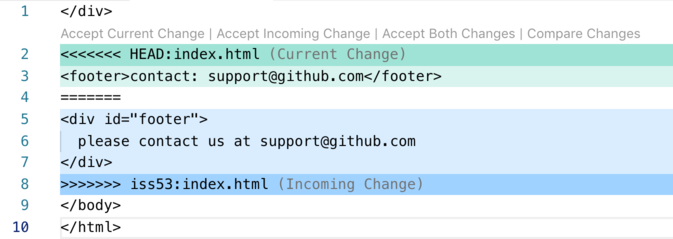
Before deciding how to edit this you probably also need to look at other files too - in this example at the CSS files to find out if the tag footer or the id footer is used.
4 Merge Requests / Pull Requests
When working in a team with git you can use git not only for the code, but also for discussions around the code, especially for discussions about what to include and what to change.
The main idea here is the merge request, as show in this simplified graphics from github:
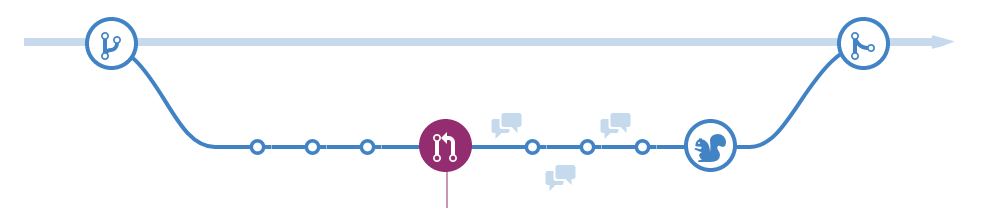
- When you start working on a new feature, you create a new branch (often called "feature branch")
- you make several commits, until you think your code is ready
- now you push your branch onto the central repository (but not to master yet!)
- now you do a "merge request" (gitlab) or "pull request" (github)
- you teammates can look at your code and write comments
- you can do new commits
- after a consensus is reached, the branch is merged into master
git flow is githubs explanation of this workflow: